
Feeling a little lost with your checkbook? Don't worry, filling out a check is easier than you think! Whether it's your first time or you just need a refresher, Gadinsider will walk you down so the process so that you are concerned about how to fill a check.
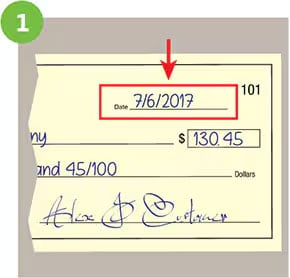
Step 1: Date it
Grab your check and a pen. Flip it over to the shiny side, and find the top right corner. There, you'll see a spot for today's date. Write it in clearly, so the bank knows exactly when this check was issued.
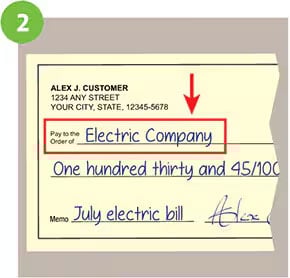
Step 2: Who gets the money?
The next line says "Pay to the order of." This is where you write the name of the person or company you're paying. If it's a friend, write their full name. For a company, use the exact name on the bill. Unsure of the full name? Check the bill for a shorter version that might work.
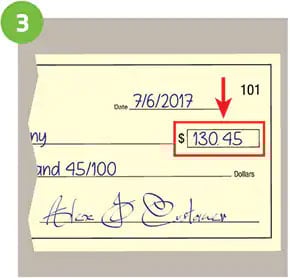
Step 3: Numbers talk
Now, let's talk money! On the right side of the check, you'll see a small box with a dollar sign ($). This is where you write the amount you're paying in numbers. Be neat and clear, so there are no mistakes when processing the check.
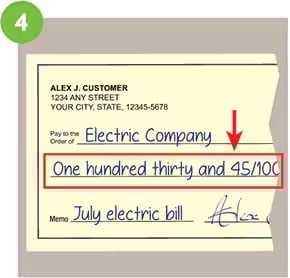
Step 4: Words matter too
Just below the line where you wrote the name, there's another space to write the amount. But this time, write it out in words! For example, if the amount in the box is $25.75, you would write "Twenty-five and 75/100 dollars." This double-checking helps prevent errors.
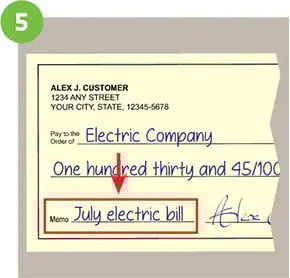
Step 5: Memo (Optional but helpful)
The memo line is like a little note on your check. It's optional, but it can be helpful for you and the receiver. Maybe you're paying rent, so you can write "Rent for May" in the memo area. Sometimes the company will ask you to write your account number on the memo line, so check your bill for instructions.
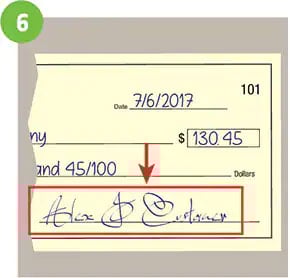
Step 6: Sign it off
Finally, the moment of truth! Take a look at the bottom right corner of the check. You'll see a line that says "Signature." Here's where you sign your name, using the same signature you used when you opened your checking account. This is your way of saying "Yes, I approve this payment."
There you have it! Your check is all filled out and ready to go. Remember, double-check everything before handing it over to make sure the information is accurate. Now you can conquer those bills and payments with confidence!


